Before you begin, make sure all variant images have been added to the product in your Shopify Admin. Clever Variant uses these existing product images to display the correct images for each variant.
Step 1: Open the Clever Variant Editor
In your Shopify Admin:
- Go to Products.
- Open the product you want to configure.
- Click More actions.
- Select Clever Product Variants.
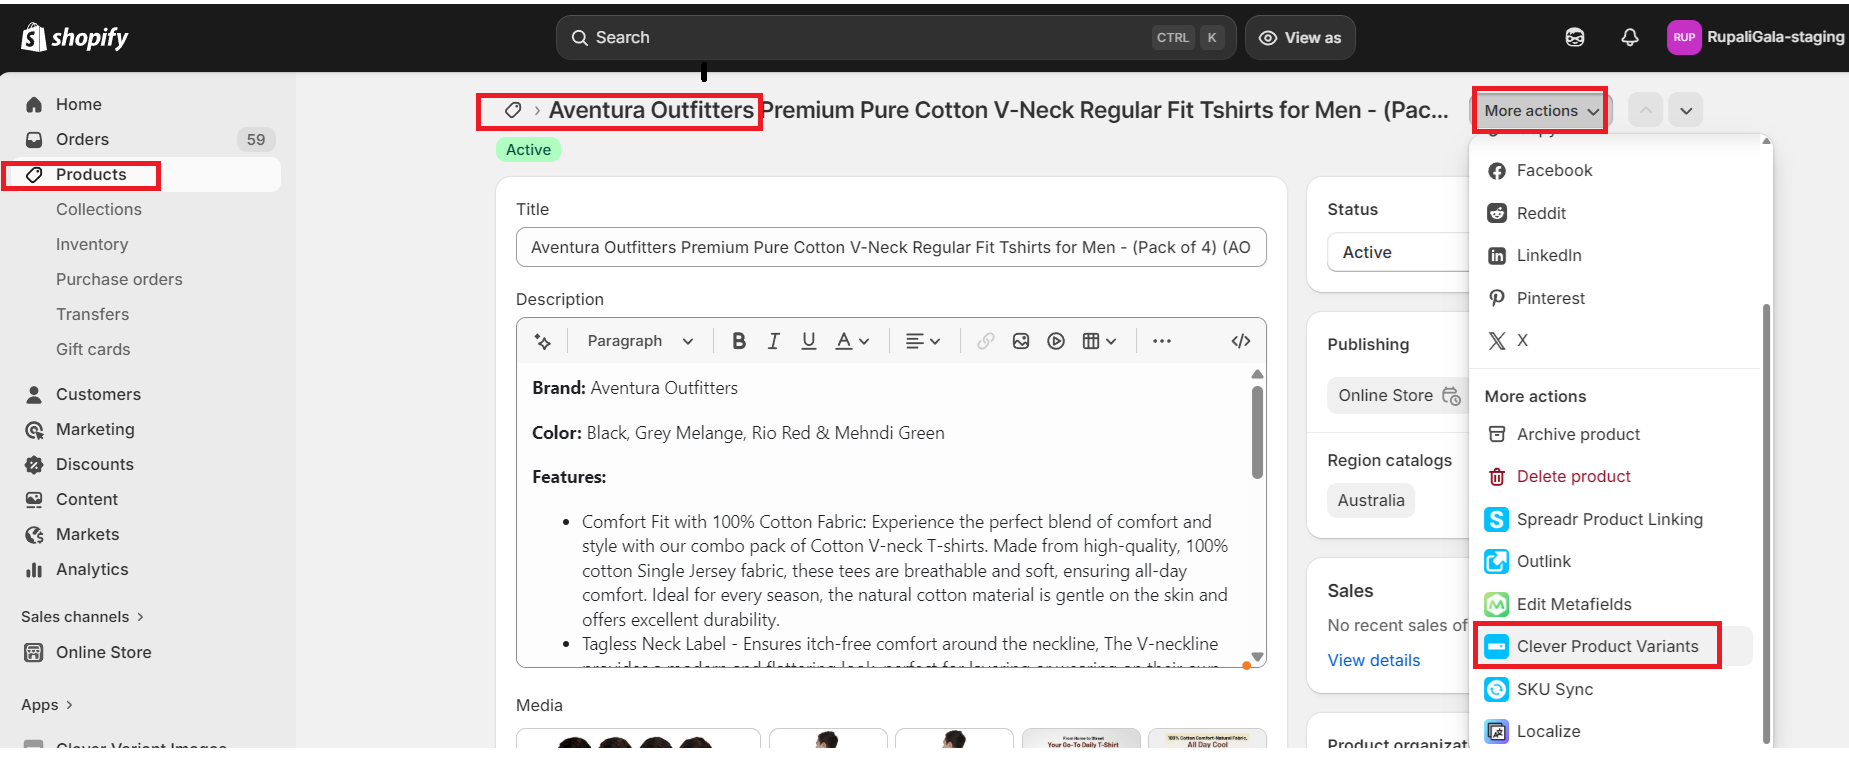
You'll be redirected to the Image Arrange page in the Clever Variant app.
Step 2: Choose the Variant Option
Select the product option (such as Color, Size, or another variant option) that should control which images are displayed on the storefront.
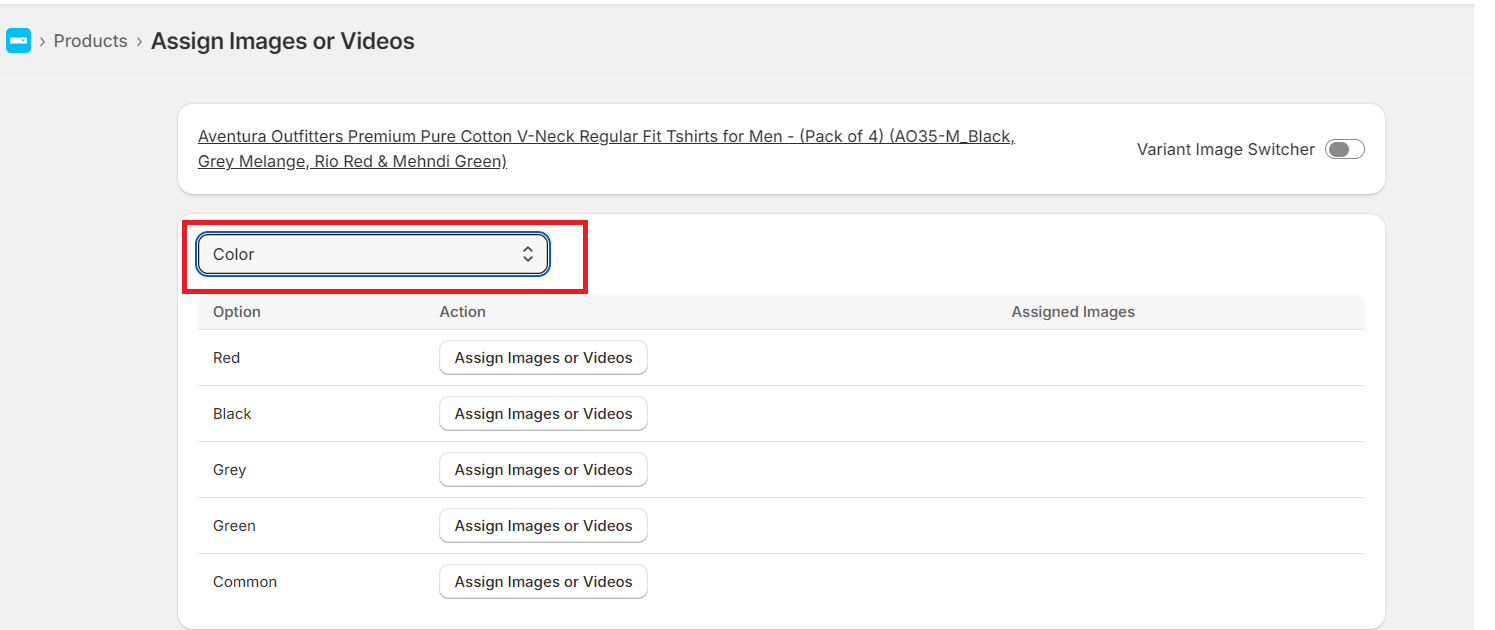
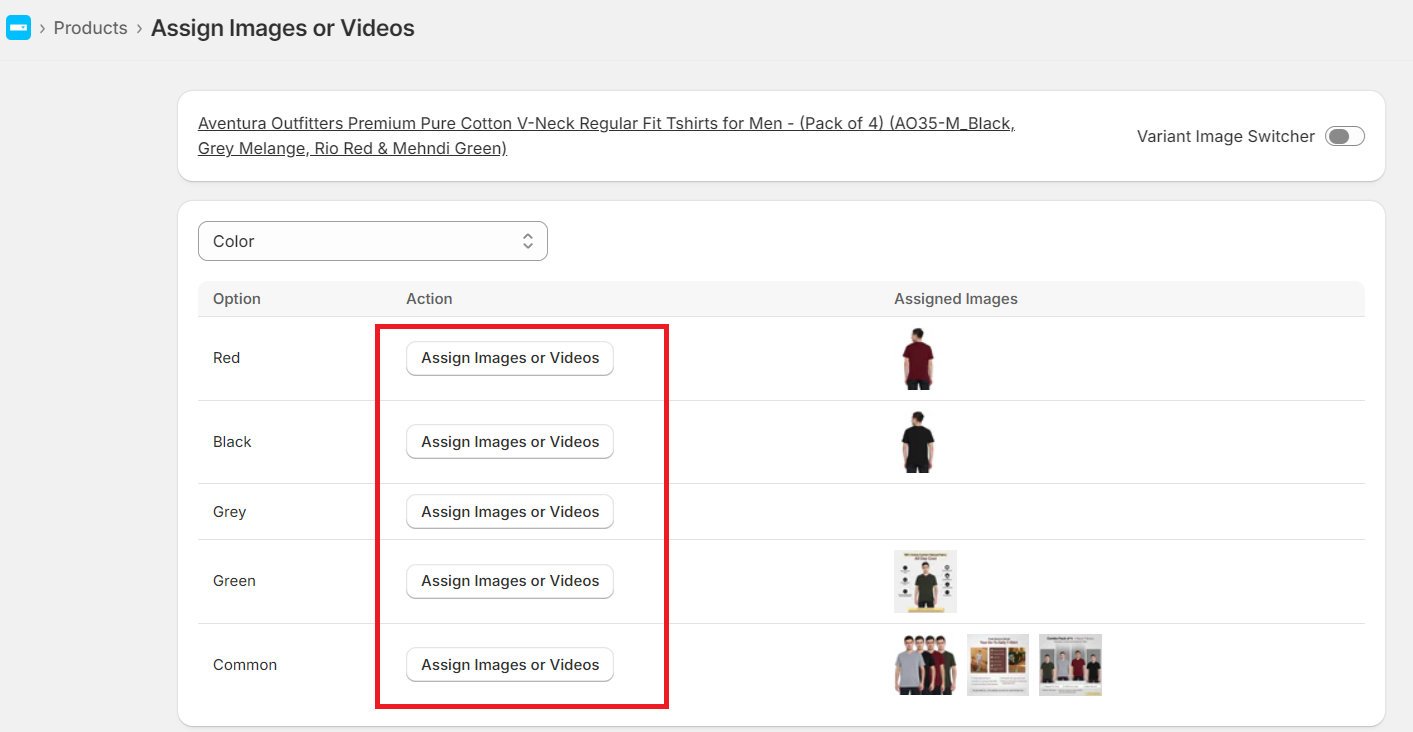
Step 3: Assign Images to Each Variant
Assign the appropriate product images to each variant based on your preferences.
For example:
- Red variant → Assign all red product images.
- Blue variant → Assign all blue product images.
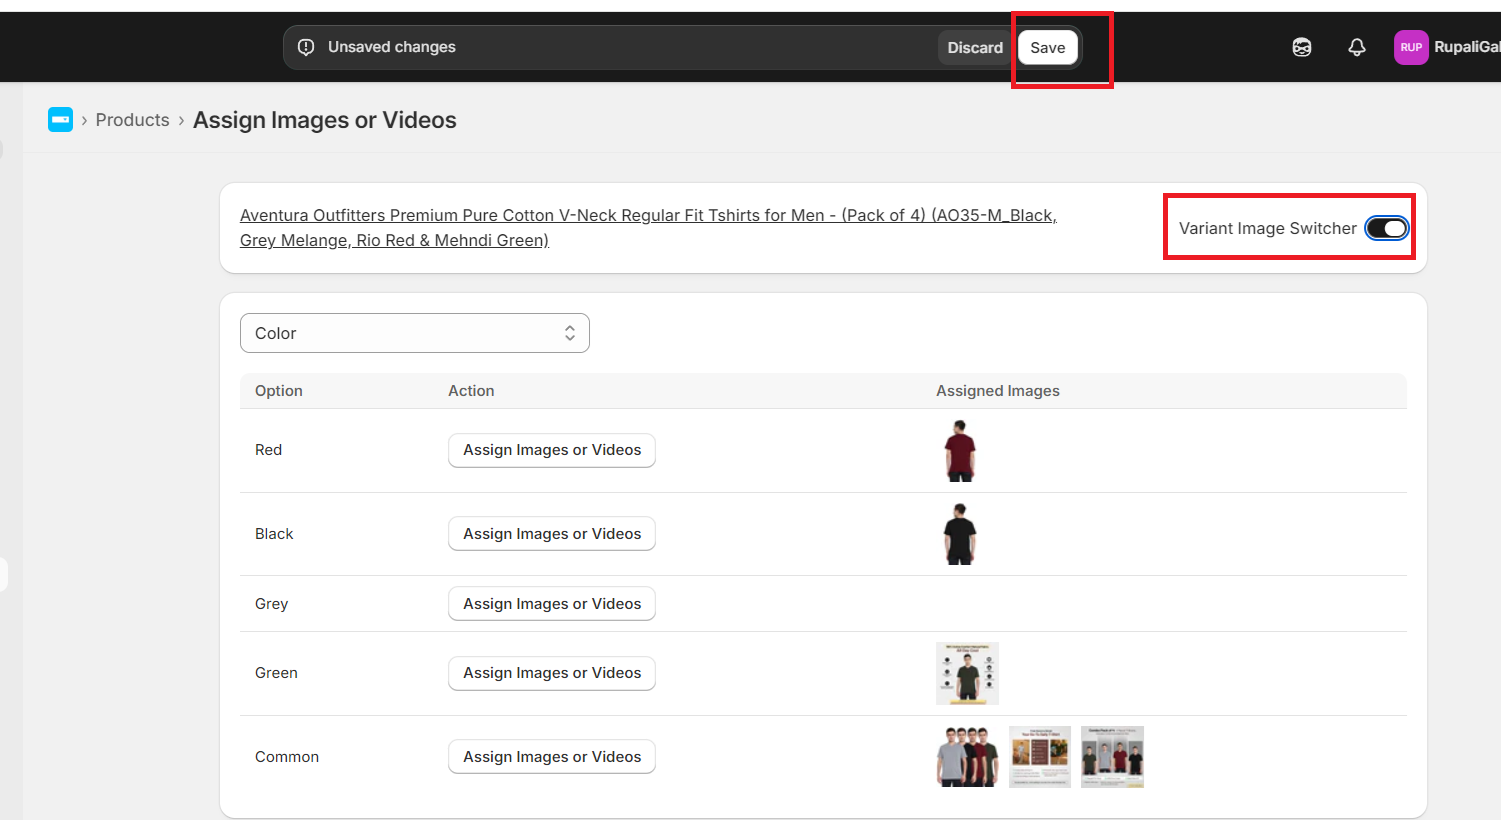
Step 4: Enable Variant Image Display
Turn ON the Variant Selector for the product.
Click Save to apply your changes.
Step 5: Verify on Your Storefront
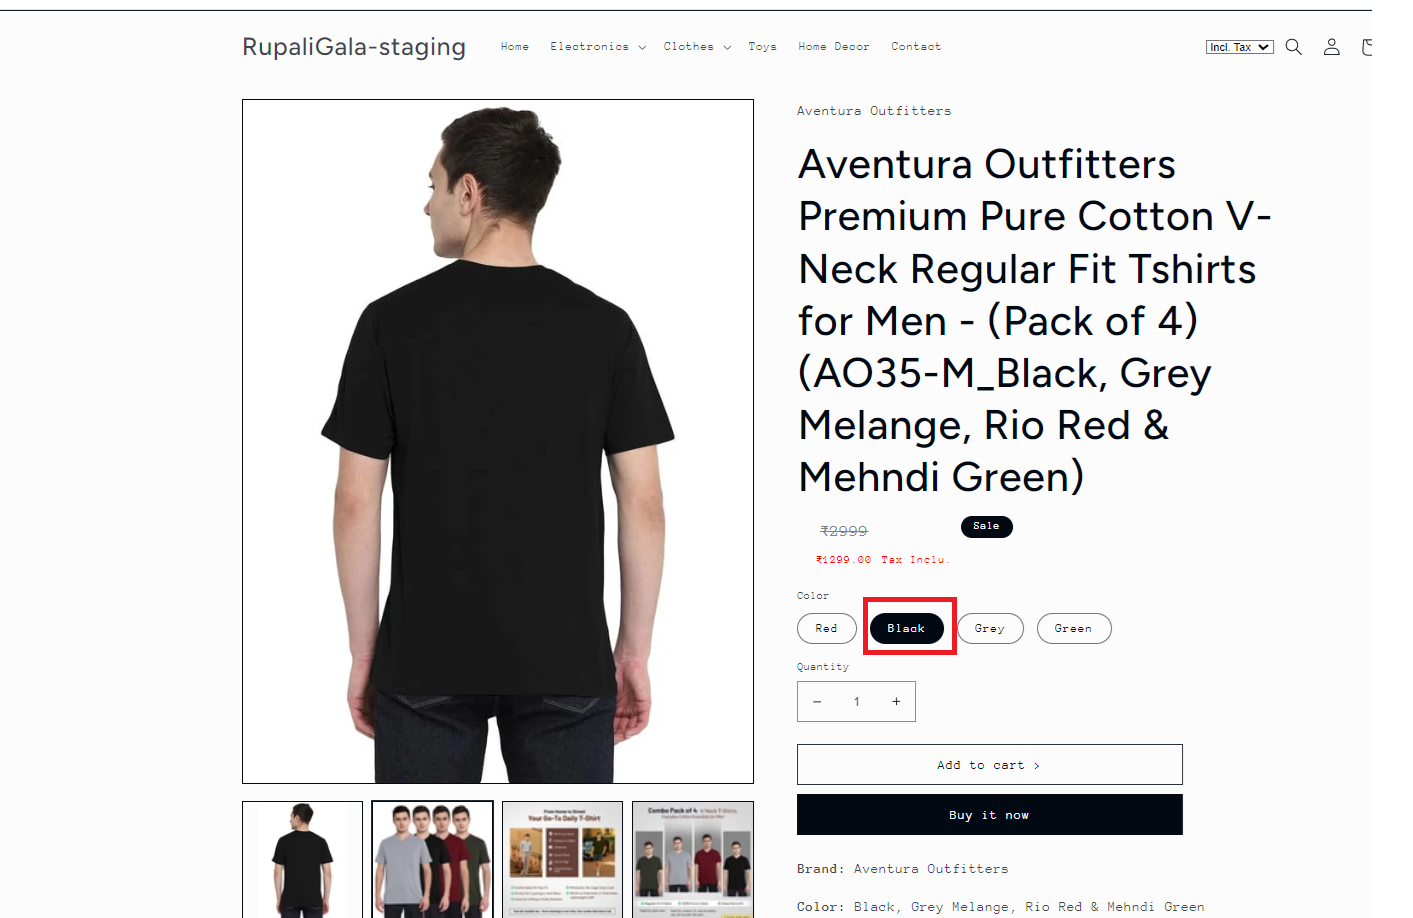
Wait 3–4 seconds, then open the product page on your Shopify storefront. Selecting a variant should now display only the images assigned to that variant.
Important Notes
Image Order
The images displayed for each variant follow the same order as they appear in your Shopify product media.
If you rearrange the product images in Shopify Admin, the image order on your storefront will automatically update to match.
Before You Start
Clever Variant can only assign images that already exist in the product's media gallery. If an image is missing, add it to the product in Shopify Admin → Products before configuring variant images.
.