Once you've installed Outlink External Links Button, you can easily add an external or affiliate link to any product.
Follow the steps below:
1. Open the Product
- Log in to your admin dashboard (if you're not already logged in).
- Navigate to Products.
- Open the product you want to configure.
- On the product details page, click More actions and select Outlink.
Tip
The Outlink option is available from the More actions menu on the product edit page.
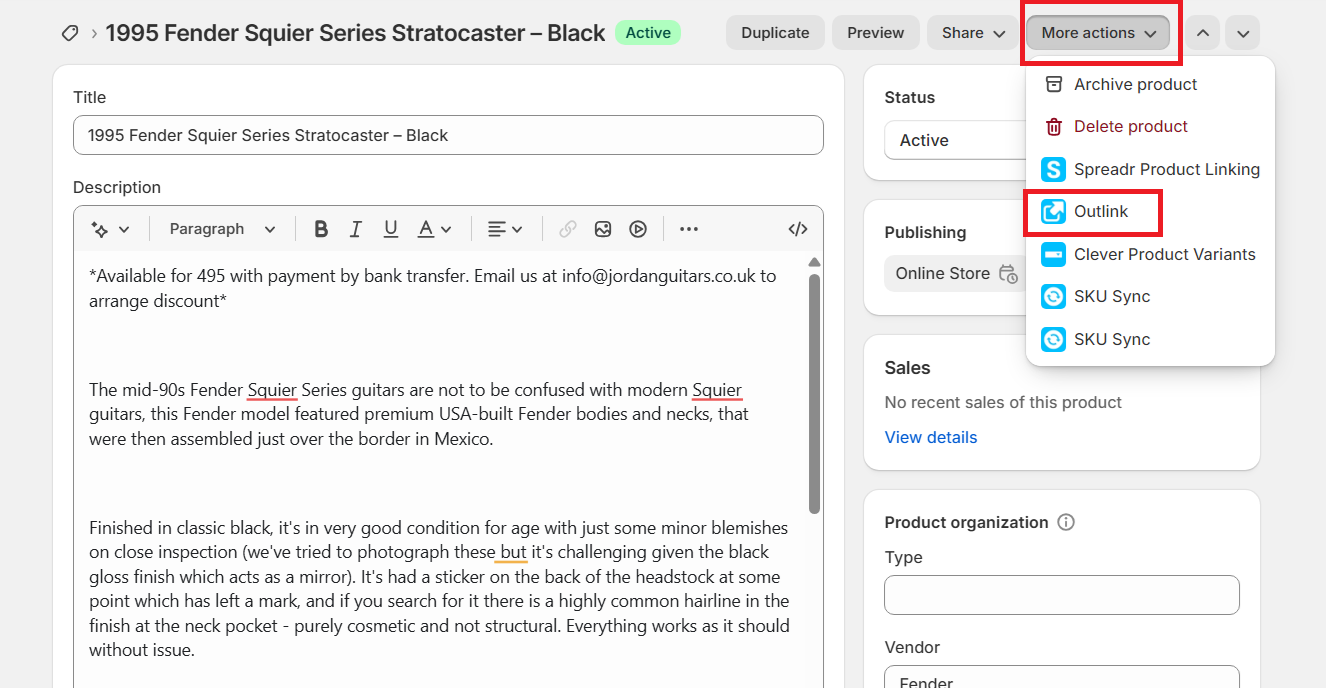
2. Configure the Outlink
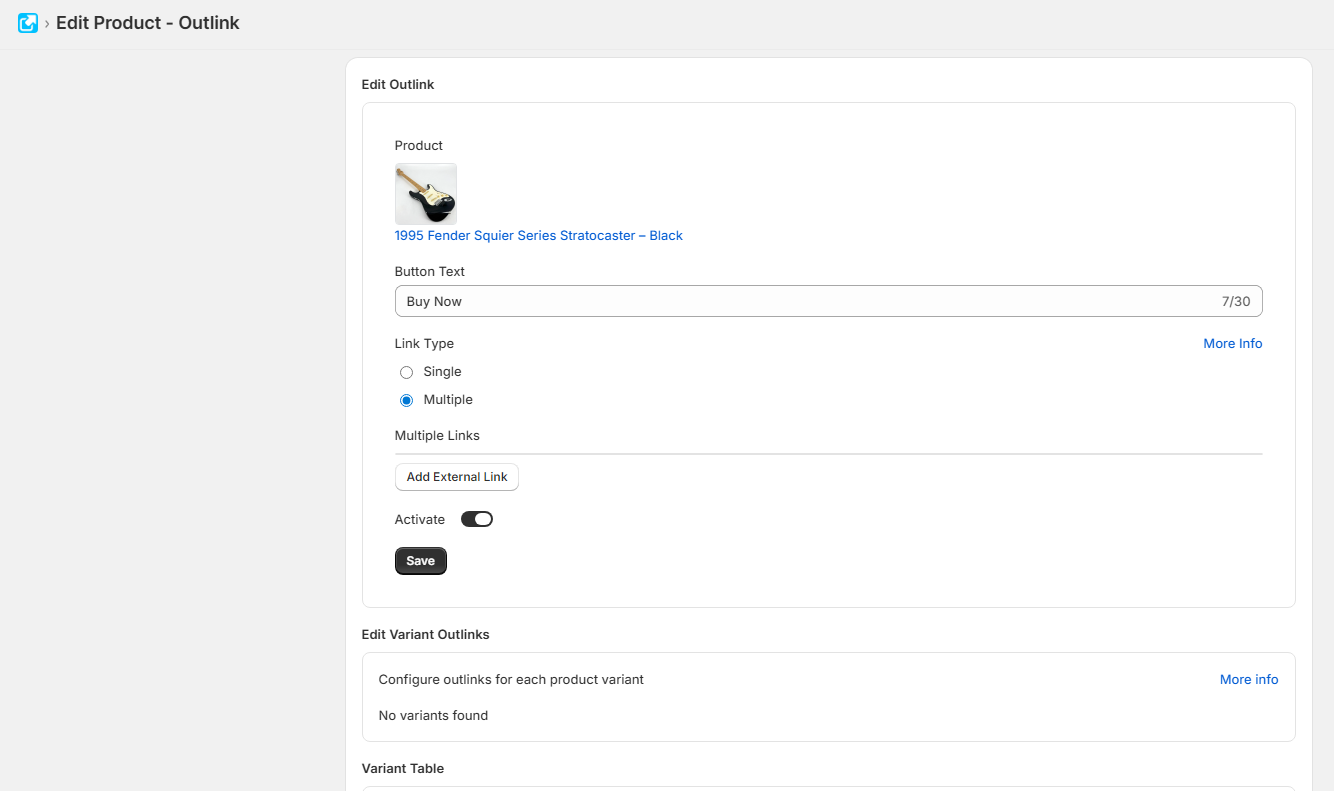
On the Edit Outlink screen:
- Enter the Destination URL (external or affiliate link).
- Enter the Button Label (the text customers will see on the button).
- Turn the Active toggle On.
- Click Save to apply your changes.
Tip
Use clear and action-oriented button text such as Buy Now, View Product, Shop on Amazon, or Learn More.
Step 3: Preview Your Product
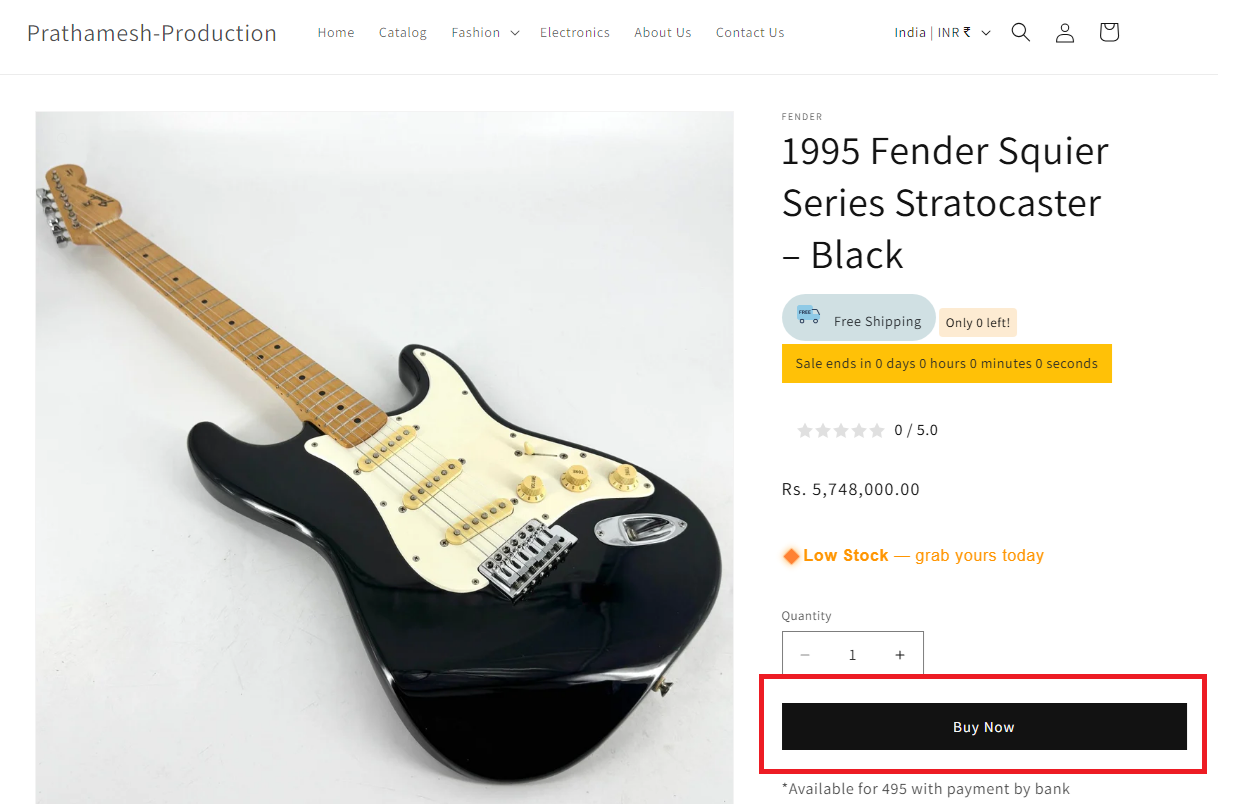
Open the product page on your storefront to verify the changes.
Depending on your app settings, you can choose to:
- Display the Outlink button in place of the Add to Cart button, or
- Display both the Outlink button and the Add to Cart button together.
When a customer clicks the Outlink button, they'll be taken to the external URL you configured. The destination opens in a new browser tab.
Success
Your product is now configured with an external link and is ready for customers to use.