The Discount Block lets you highlight discount codes, special offers, and promotional deals directly on your Shopify product or landing pages.
Showcasing promotions where customers are making purchase decisions helps increase urgency, boost conversions, and encourage more completed orders.
✨ Benefits
- 🎟️ Display discount codes and limited-time offers
- 🛍️ Promote seasonal sales, bundle deals, and special promotions
- ⏳ Create urgency with clear, eye-catching offers
- 🎨 Customise text, colours, and styling to match your Shopify store
- 📈 Encourage higher conversions and reduce cart abandonment
With the Discount Block, you can make your best offers impossible to miss and motivate customers to purchase before the deal ends.
How It Works?
Step 1: Setup the metafield
- On your app dashboard homepage, locate the Discount Block.
- Click Setup Metafield to automatically create a product-level metafield:
- Namespace & key > neo.product_discount
This metafield will link your discount promotions to products.

Step 2: Add entries for metaobjects
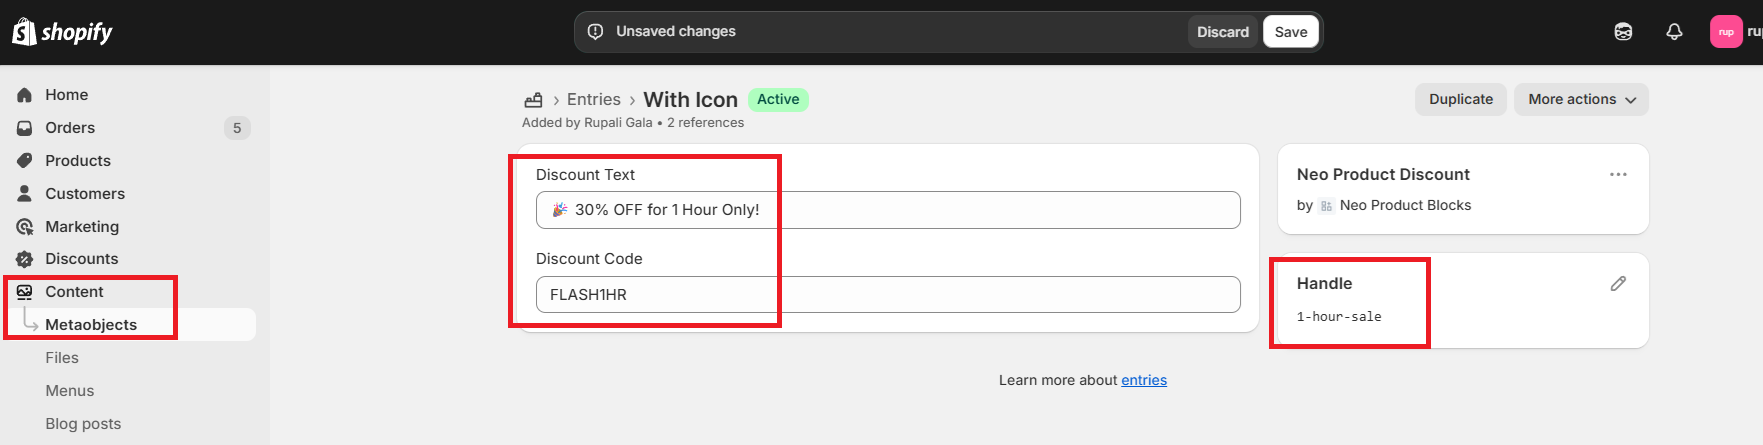
- In your Shopify admin, go to Content > Metaobjects.
- Locate Neo Product discount block.
- Add entries containing:
- Discount text
- Discount Coupon
Example:
- Discount text: 30% OFF for 1 Hour Only!
- Discount coupon: FLASH1HR
You can add as many entries as you want to display. Click Save when done.
Note: We recommend setting unique handle names for your FAQ entries. This makes it easier to identify and assign them to the right products later.
Step 3: Assign entries to products
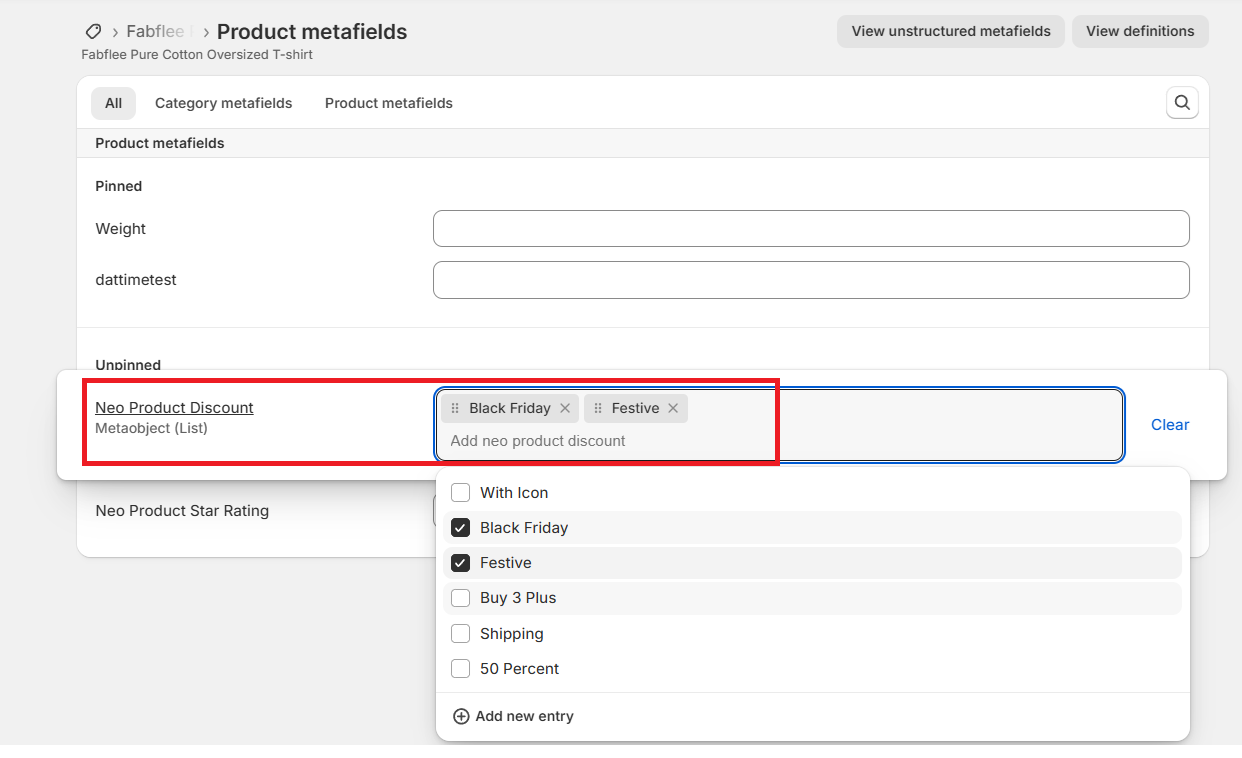
- In the Shopify admin, open the product where you want to display the discount.
- Scroll to Metafields > Neo Discount Block
- Select the entries you want to assign to that product.
- Click Save.
Step 4: Add the block to your product template
- Go to Online Store > Customize theme settings.
- Open your Product Template.
- Add and position the Neo Product Discount Block as required.
Step 5: Connect metaobjects
Choose how you want to connect and display entries:
- Dynamic (bulk): Displays all metaobject entries assigned at the product level.
- Dynamic (one-by-one): Select specific entries to display across all products.
- Static: Manually add fields for discount inside the block (applies commonly to all products)
Note: Empty the "Message to display" and "Discount Code" field key text values when you are connecting dynamically in bulk.
You can find the detailed explanation here
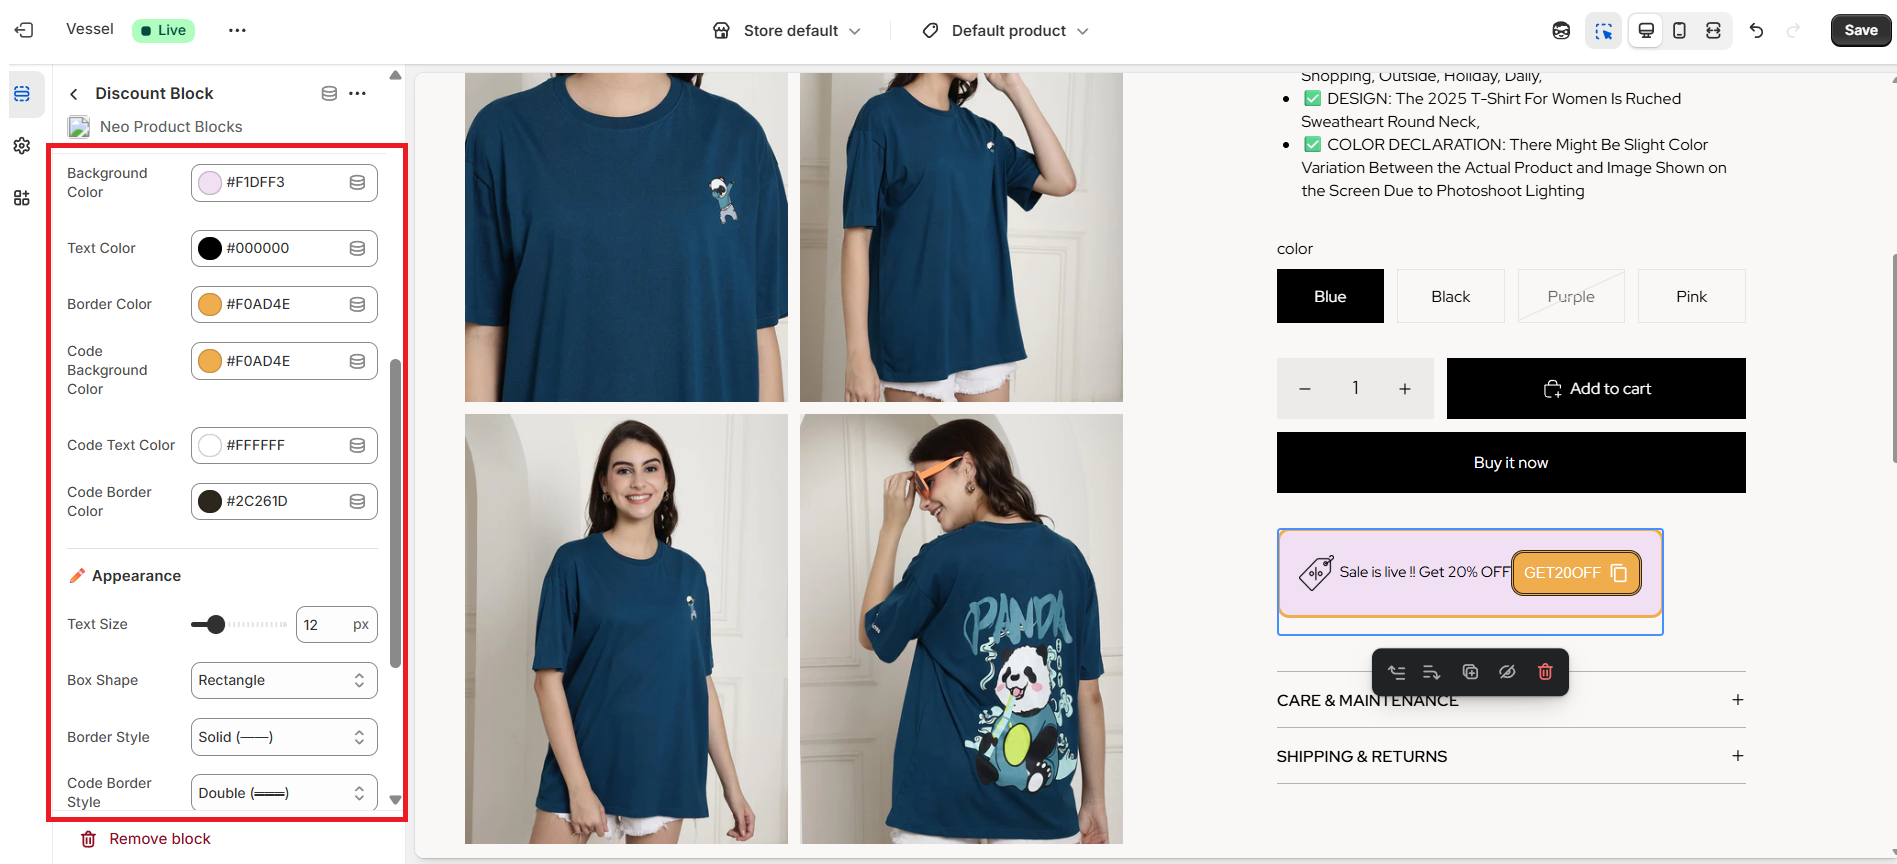
Step 6: Style your block
From the block settings, you can customize:
- Text size
- Icon style
- Message Text & coupon code text and background colors
- Border style etc.
Preview your changes to ensure they match your store’s design
Step 7: Save & Publish
When everything looks good, click Save to publish your updated product pages.